Home - Return to Previous Page

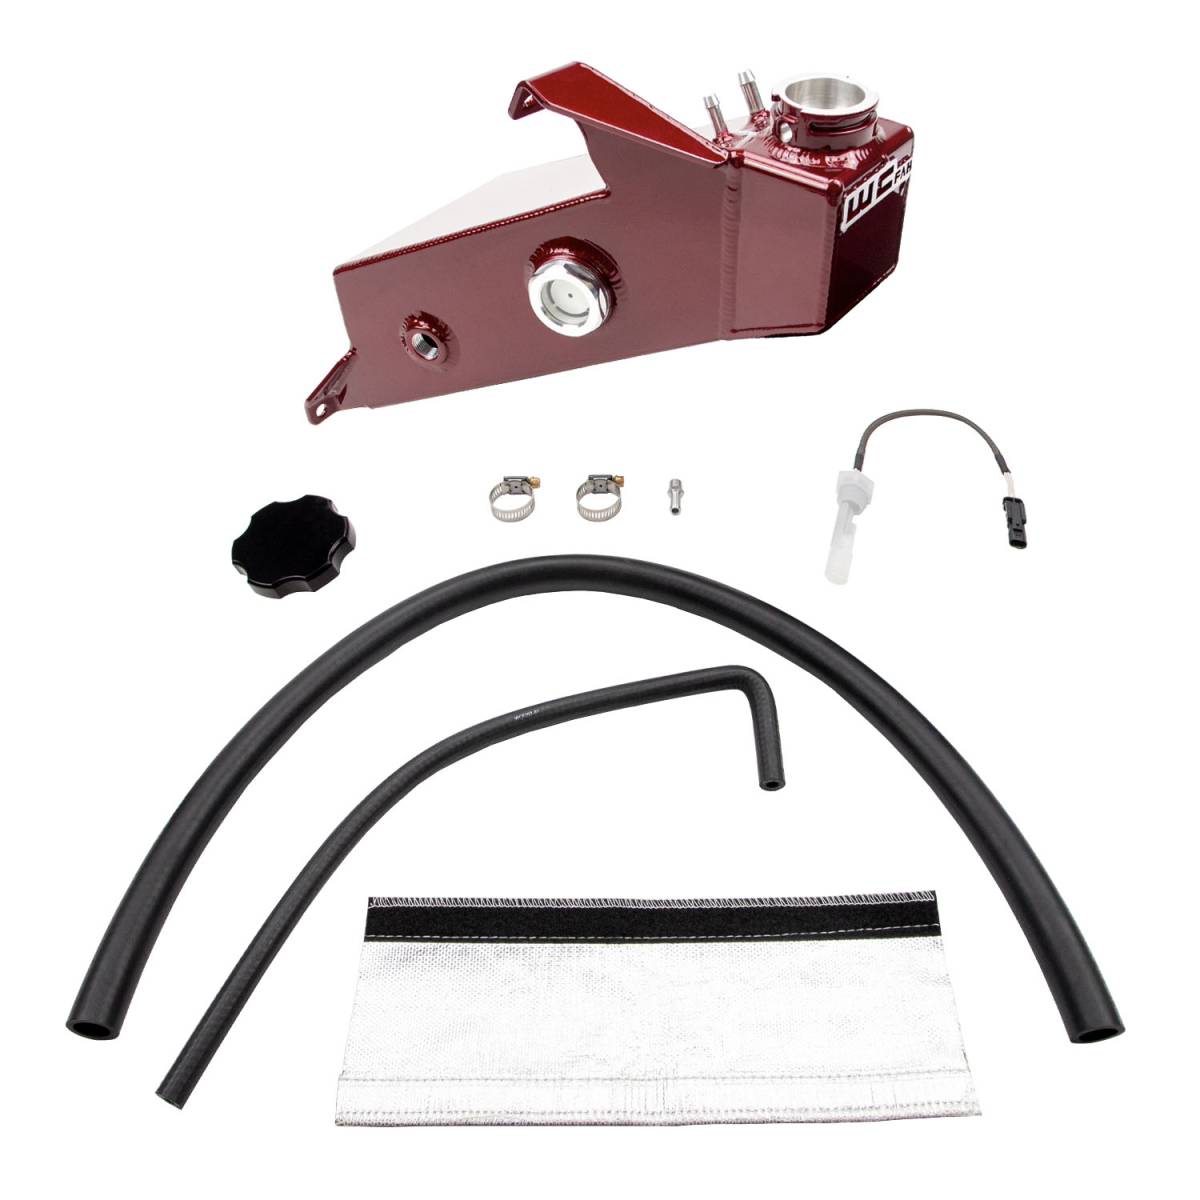
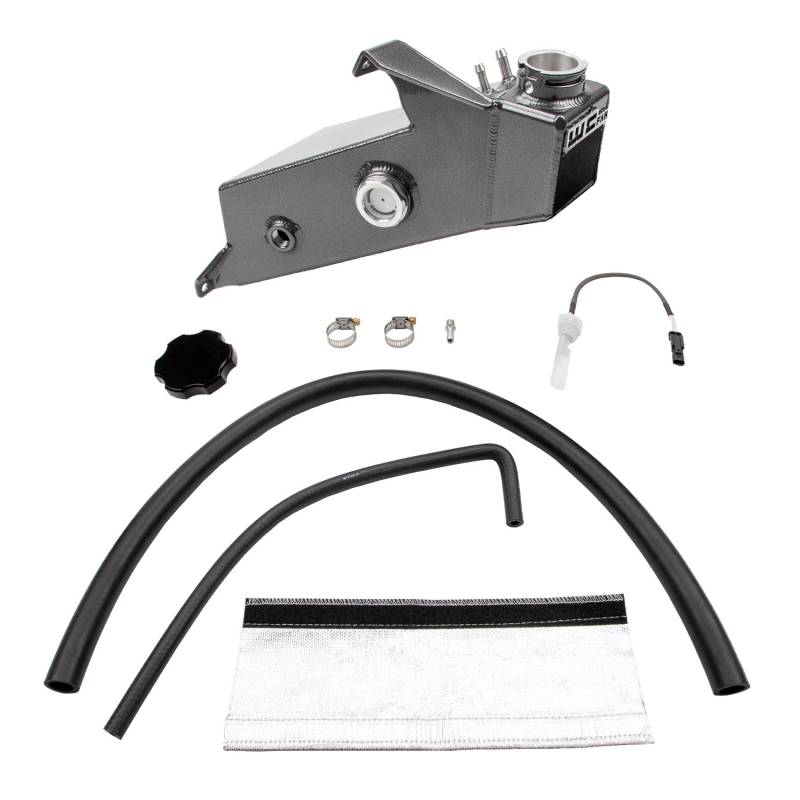
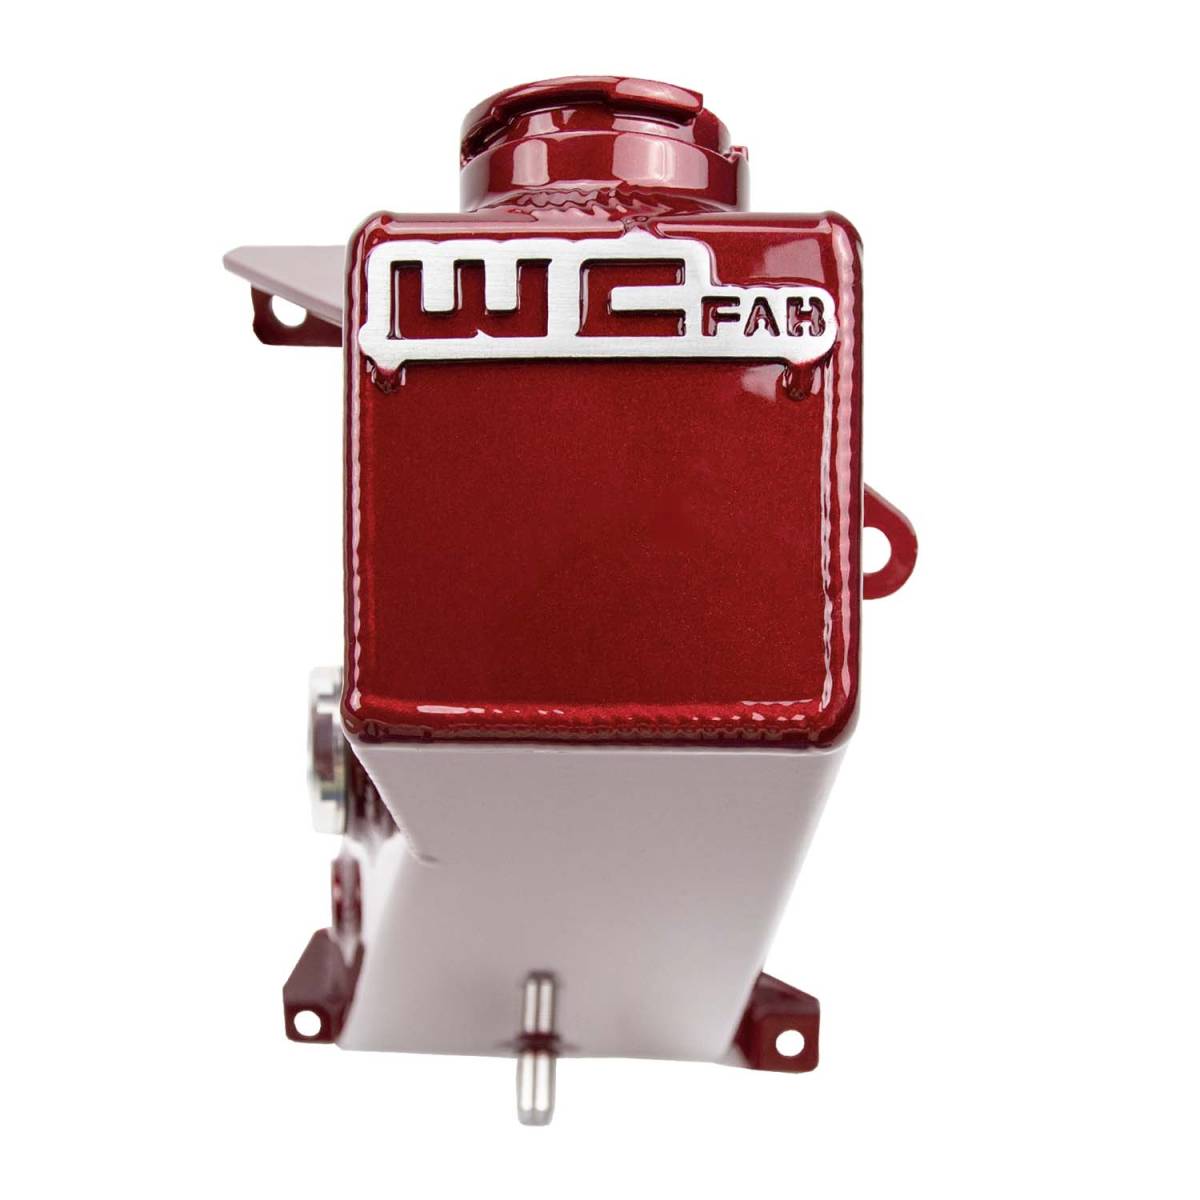
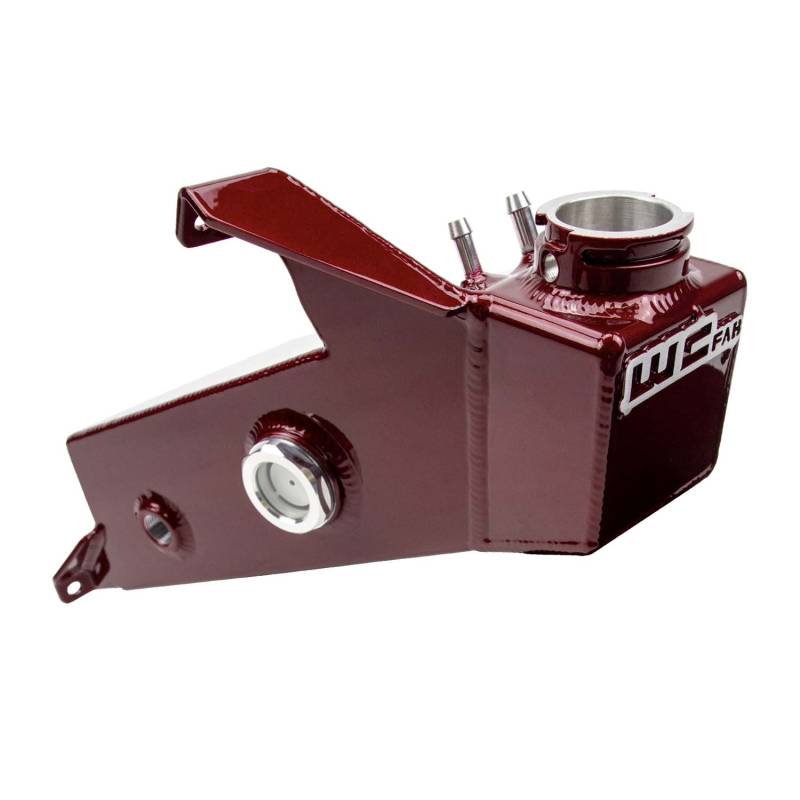
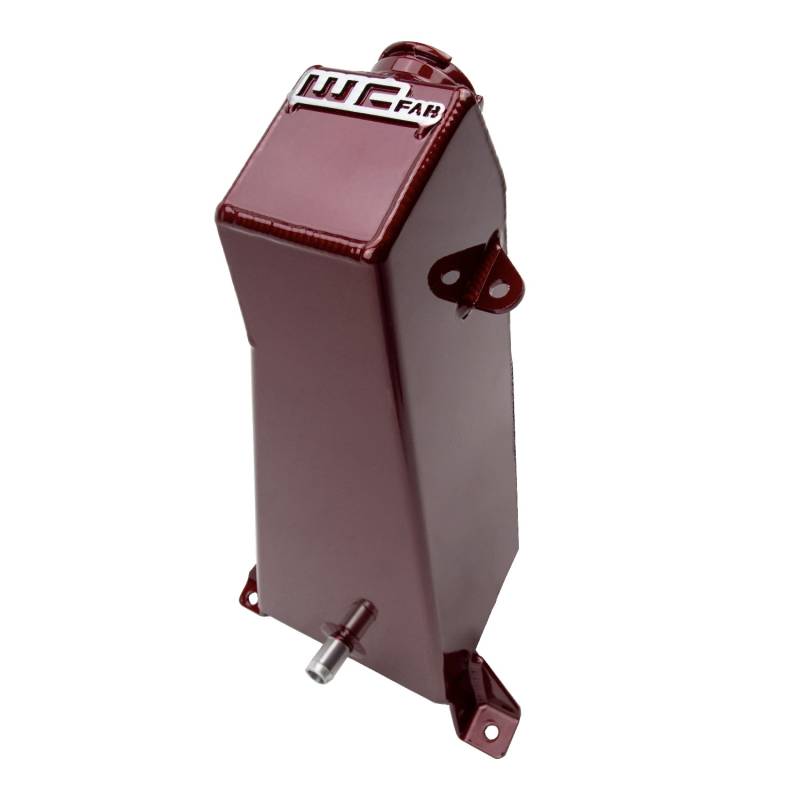

2019-2024 6.7L Cummins OEM Placement Coolant Tank Kit
WCF100284
-Coolant Tank
-Low Coolant Level Sensor
-Black Anodized Billet Aluminum Cap
-Over Flow Hose
-Coolant Level Sight Glass
-Installation hardware
-Heat Shield Wrap
-Powder Coating
-Low Coolant Level Sensor
-Black Anodized Billet Aluminum Cap
-Over Flow Hose
-Coolant Level Sight Glass
-Installation hardware
-Heat Shield Wrap
-Powder Coating
Availability: WCFab Red, WCFab Grey, Illusion Purple, Bengal Red, Gloss White, and Gloss Black in stock and ships in 3-5 business days. 10-15 business day lead time on other colors.
Pricing:
$540.00
Description
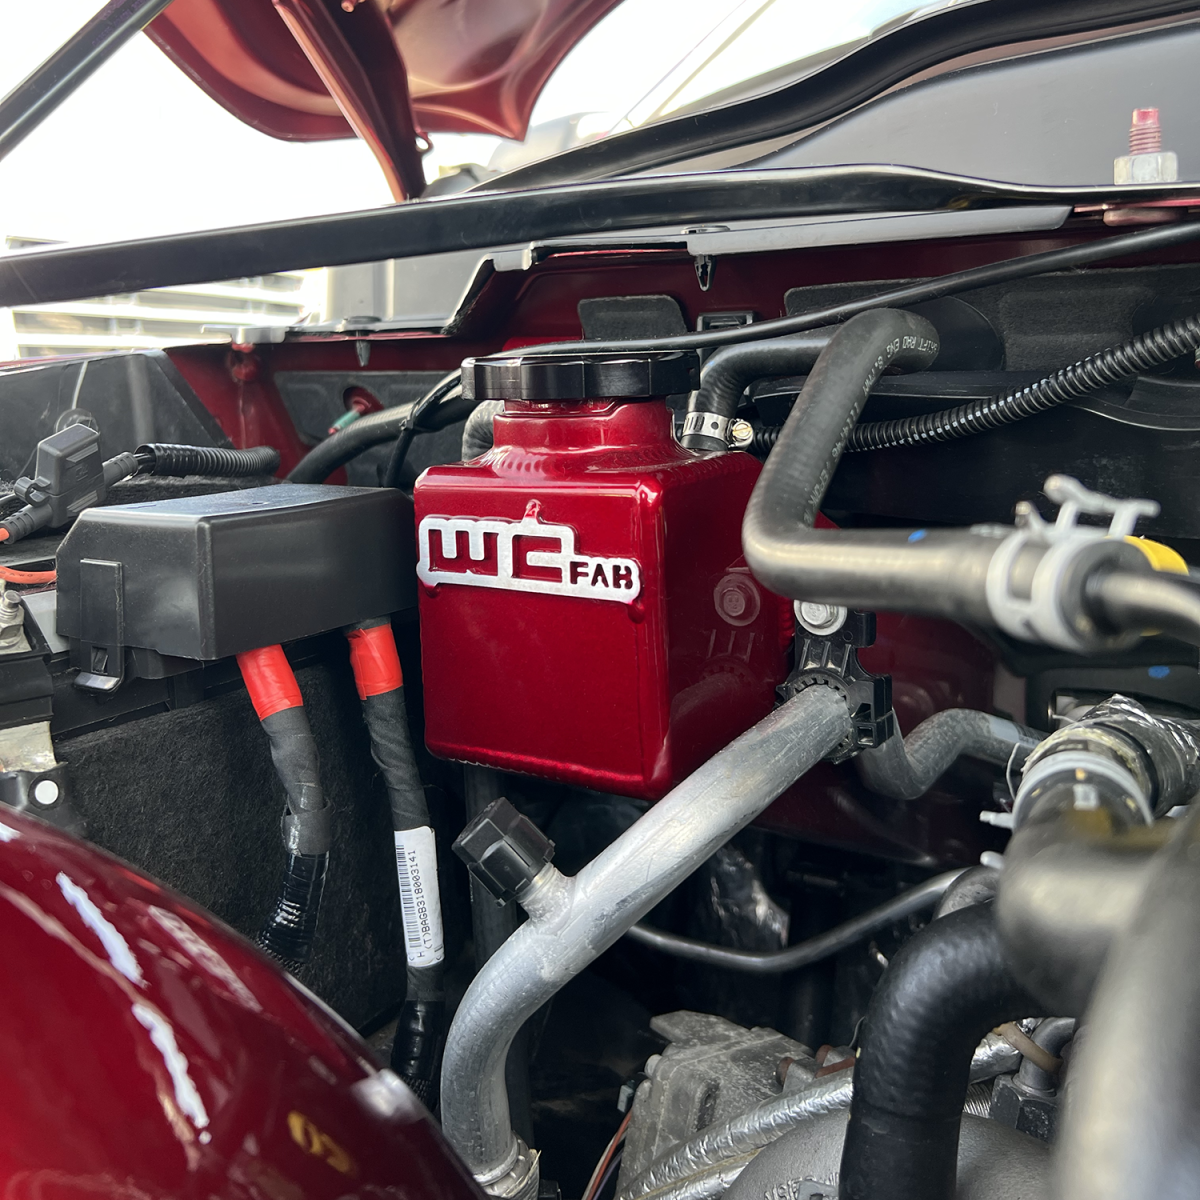
2019-2024 6.7L Cummins Fabricated Aluminum Coolant Tank Kit, mounts in OEM coolant tank location.
- Dress up your engine bay by replacing the ugly clear plastic coolant reservoir with our custom powder coated fabricated aluminum coolant tank with sight glass
- Includes black anodized CNC machined billet aluminum cap, coolant level sight glass, mounting hardware, overflow hose and low coolant sensor
- Will fit on stock trucks with no other modifications necessary
- Uses OEM mounting points
- Installs with basic hand tools
Replaces the following MOPAR Part Numbers: 68370066AC
Compatible with stock / drop-in turbo setups. Low profile design eliminates engine side bracket found on stock plastic tanks and offers significantly improved clearance for lower front edge of tank assembly vs. stock allowing for better compatibility with aftermarket turbo setups.
Video
Tech Support Video
Transcript
Good day. I'm Ryan Killey, a sales and tech support technician at WCFab. Today, I'll address common questions we receive about coolant tanks, particularly focusing on the correct installation of the cap and coolant sensors.
PROPER INSTALLATION OF COOLANT TANK CAP
The cap itself is a two-pronged style, similar to older version coolant tanks and older version radiators. So there are two prongs on each side that you'll line up with two grooves that we have on the tank itself. So you drop that down into place, give it a good push down, and twist it. Now you'll feel it get loose and wiggle. That's in the first detent. It's not where it's supposed to be, so you give it another good push and twist it, and you'll feel it turn and lock right where it's supposed to be. As you notice, it doesn't wiggle or move anything in place, and no coolant will come out of that. Now, I'll move on to the sensors themselves. So we have two sensors here to show you.
FIRST GENERATION SENSOR
The first sensor is our GEN ONE sensor. This is a discontinued sensor. We no longer use this, but there are still maybe some in circulation, so we wanted to point it out to you anyway. This sensor is just a simple float design. On the side here, you'll notice there's an arrow. This one's got a little bit of debris on it, so you can see the arrow a little bit easier, but you want to make sure the arrow is POINTING UP. The arrow pointing up tells you that the float is properly positioned. So when the cooling tank is full, it'll sit like this: As cooling levels go down, it'll disconnect. It'll throw a low cooling light.
NEW SENSOR DESIGN
The second sensor is our new Gen 2 sensor, which works similarly. The one thing I want to point out is the arrow that's on the backside here with the wires. The arrow has to POINT DOWN. If the arrow's not pointing down, it'll throw a low coolant light immediately. Similar process here. It works because it sits like so, or the coolant tank is full, and then the coolant level drops, and then it throws a little coolant light. Very similar process and sensor. Just a little bit different design that we've moved on to.
INSPECTING THE SENSOR BUNG ON THE COOLANT TANK
Now, I will show you guys the proper way to install this sensor. It will go on the backside of the tank here on this bung. So, the first thing I want you to do is to inspect the hole itself and make sure there's no dirt, debris, any metal shavings, or anything that's in this bung that could be. We do tap them and we do inspect them before we send them out. But it is one thing that I always want you to check before you put the sensor in, and you will want to use a high-temperature thread sealant.
HIGH-TEMPERATURE THREAD SEALANT
We use PERMATEX. It works very well. I will take this and do a pretty good layer over the sensor. I'm going to get a little messy here and use my finger a little bit on it. You want to make sure the majority of the threads have a pretty good layer of thread sealant over them.
You don't want to go overboard, but you want to ensure they're full. That way, it has time to sit, cure, and seal up in the threads on the tank.
INSTALLING THE SENSOR
Next, you're going to go ahead and drop in the sensor. With your hand to start, you want to get it as tight as possible, so be cautious with the wires. You don't want to get these all twisted up and ruin the connection. You'll get down pretty far. The sensor will be almost in. That's as far as I can get by hand. As you can tell, the arrow on the sensor is pointing up at an angle, and we need it to point down.
So, I'm going to set this backdown. If you have the new black sensor, you’ll take a 13-millimeter wrench and give it a good spin. I will go around again here, and then you’ll have it like so, where the arrow is pointing down. We can typically wipe off some of this extra Permatex here to make it look slightly cleaner. And then, you will want to let this sit for at least 24 hours. The cure rate on this does take a little while. If you fill it up with coolant sooner, it will cause a leak. So I recommend 24 hours at a minimum for it to properly here so that you don't have any leaks on your coolant sensor.
CONCLUSION
That is all we have today with the coolant cap and cool it sensor install. If you have any more tech questions or tech support that you would like to see, feel free to comment below and let us know. Thank you. Have a good day.
Details
- WCF100284
- WCF100284
- Wehrli Custom Fabrication
- WCFab Red, WCFab Grey, Illusion Purple, Bengal Red, Gloss White, and Gloss Black in stock and ships in 3-5 business days. 10-15 business day lead time on other colors.
- New
Shipping Information
- Item Requires Shipping
- 12.0 lbs.
- W32.0000” x H12.0000” x L12.0000”
- This item ships in its own box.
Customer Reviews
 Total Reviews (0)
You must login to post a review.


Write the First Review!